The Foundation: Stance and Setup
Every good delivery begins before the ball moves. Your setup — where you stand, how you hold the ball, and how you position your body — determines the quality of everything that follows. Inconsistency in your stance leads to inconsistency in your game, no matter how good your mechanics are mid-approach.
Where to Stand
Most bowlers use the dots on the approach (the approach area is the part of the lane behind the foul line where you walk) to set their starting position. There are two rows of dots: one set approximately 15 feet from the foul line (for five-step players) and one about 12 feet from the foul line (for four-step players). Precise starting position depends on your target line — where you want the ball to cross the arrows — and is determined through practice and adjustment.
Your body should be relaxed and balanced. Feet together or slightly spread, weight comfortably distributed. Your knees should be very slightly bent — not a deep squat, but not locked straight either. Tension is the enemy of a smooth approach.
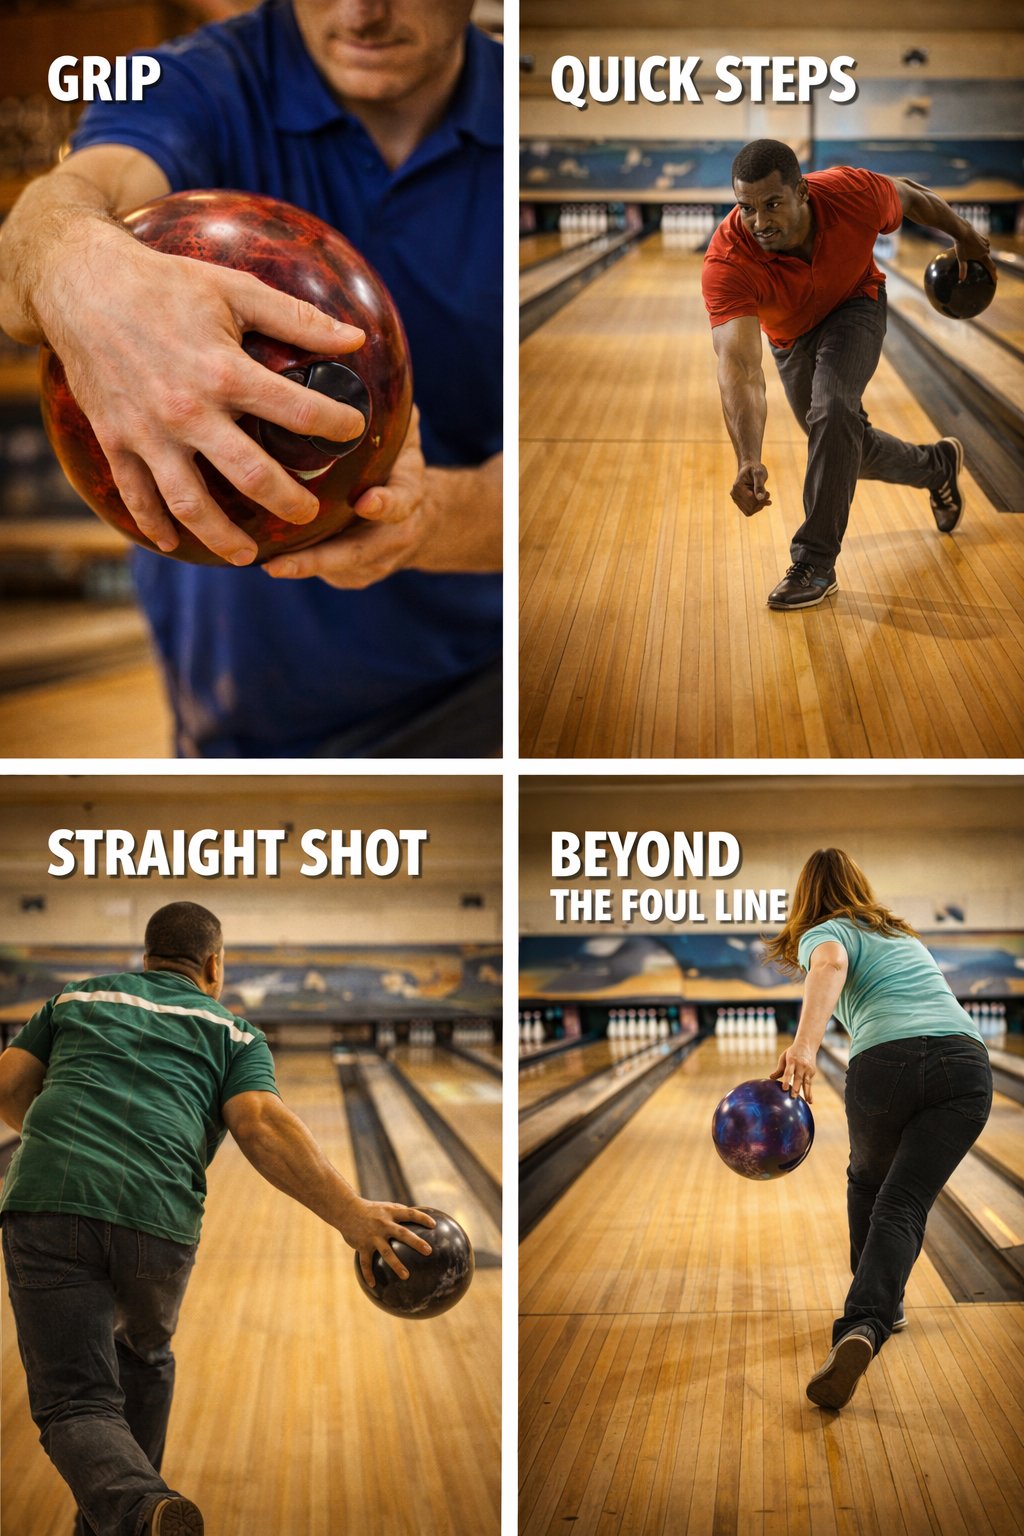
Holding the Ball
Grip is one of the most personal and important aspects of bowling. The three most common grip styles are the conventional grip, the fingertip grip, and the relaxed fingertip grip. Most recreational bowlers use the conventional grip (fingers inserted to the second knuckle) while serious competitive bowlers predominantly use the fingertip grip (fingers inserted only to the first knuckle), which enables greater hook potential.
- Conventional grip: Middle and ring fingers inserted to the second knuckle. More control, less hook. Good for beginners.
- Fingertip grip: Middle and ring fingers inserted to the first knuckle. More leverage, more hook. Standard for competitive players.
- Relaxed fingertip: Similar to fingertip but with less tension. Used by players focusing on smooth releases.
Key principle: Your grip should be firm enough that the ball doesn't slip — and no firmer. A tight, tense grip kills your swing, kills your timing, and kills your hook. Relax your hand. Let the ball do the work.
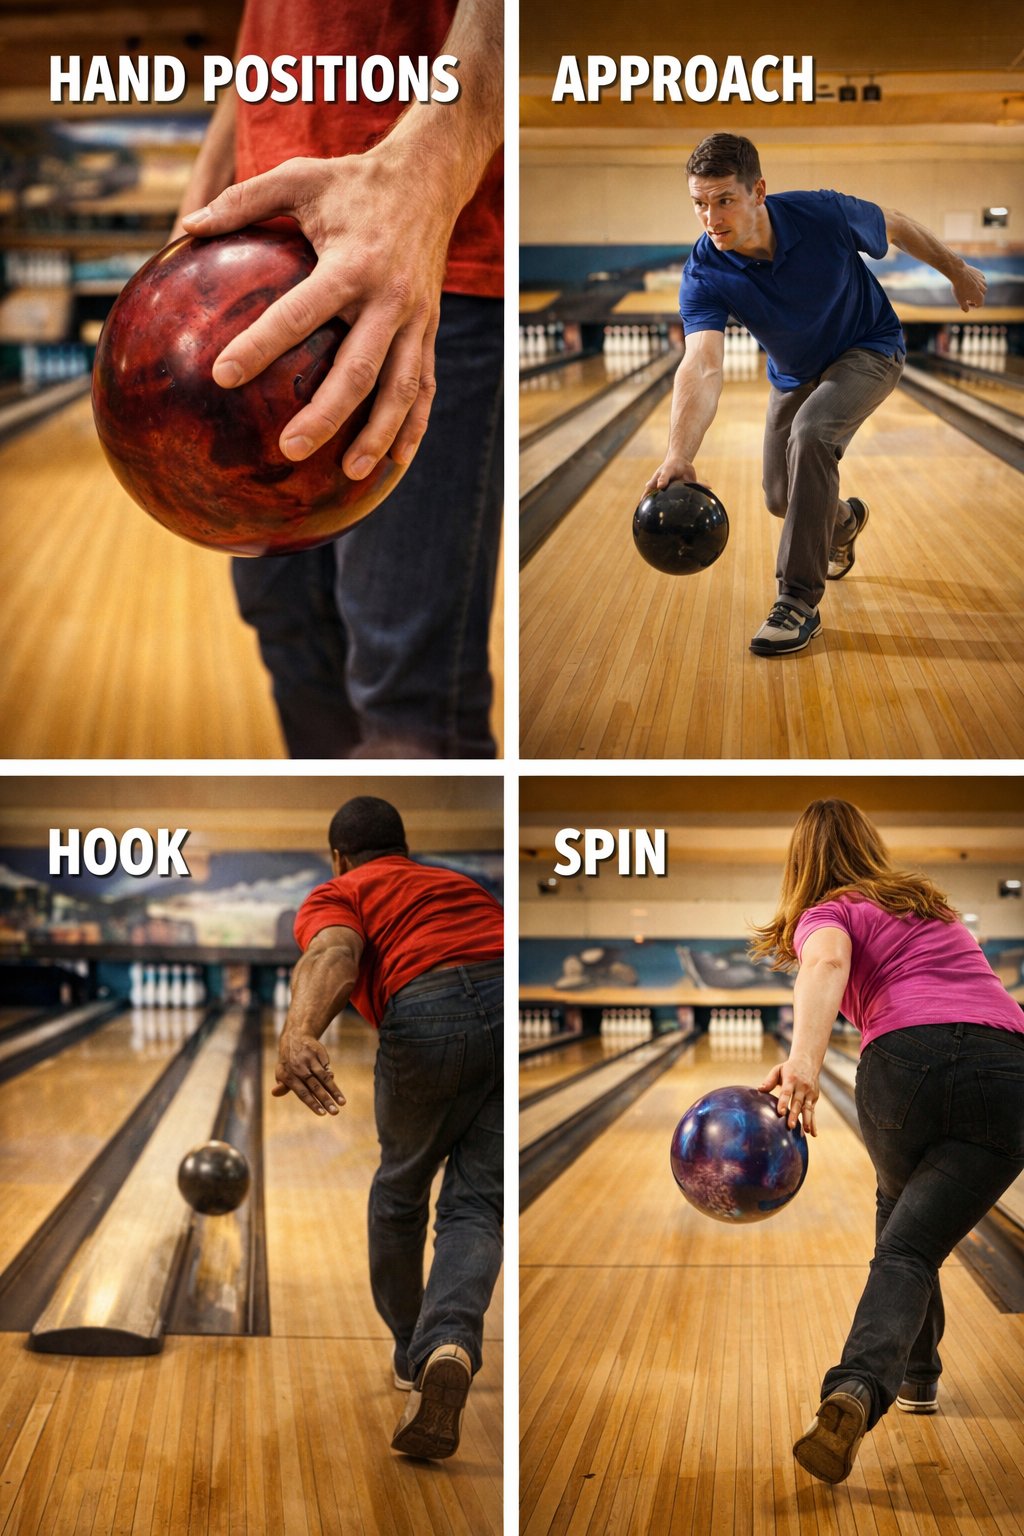
The Approach: Four Steps vs. Five Steps
The approach is the series of steps you take before releasing the ball. Most bowlers use either a four-step or five-step approach, though three-step and six-step approaches exist. The number of steps is less important than the consistency and timing of those steps relative to your arm swing.
The Four-Step Approach
The four-step approach is the most common. Each step corresponds to a phase of the arm swing:
- Step 1 (Pushaway): Your right foot moves forward (for right-handed bowlers) as you push the ball out in front of you. The pushaway direction and height determine your swing plane.
- Step 2 (Downswing): Your left foot moves as the ball swings down from the pushaway position. Gravity is your friend here — don't force the ball down.
- Step 3 (Backswing): Right foot steps again as the ball reaches the top of the backswing. The backswing height affects power — most coaches recommend keeping it around shoulder height to maintain control.
- Step 4 (Slide and Release): Your left foot slides into the foul line as the ball comes forward and you release it. Your slide foot should be pointing at your target.
The Five-Step Approach
The five-step approach begins with a half-step (sometimes called a "get started" step) that gets your body in motion before the pushaway. Many bowlers find this extra step makes the approach feel more natural and fluid. The timing of the pushaway shifts to step two in a five-step approach, but all other fundamentals remain the same.
The Release: Where Power Meets Precision
The release is the single most important moment in bowling. Everything else — stance, approach, timing — exists to set up a clean, consistent release. The release determines ball speed, rev rate (how fast the ball spins), axis tilt, and ultimately where the ball goes and how it reacts to the pins.
Straight vs. Hook Release
There are fundamentally two types of releases: straight (or stroker) and hook. A straight release sends the ball in a relatively straight path to the pins. A hook release gives the ball a curved trajectory — the ball travels relatively straight through the oil, then hooks sharply at the breakpoint toward the pocket as it reaches the dry area of the lane.
The hook is far more effective for striking because it creates a more favorable entry angle into the pocket. A ball entering the 1-3 pocket (for right-handed bowlers) from an angle has more pin action than a ball rolling in straight. Most competitive bowlers develop a hook release.
The Mechanics of a Hook Release
Creating hook requires rotation of the fingers at the point of release. As the ball swings forward, you gradually rotate your bowling hand from a "handshake" position (thumb at 10 o'clock for right-handers) to a position where your thumb exits first and your fingers rotate from roughly 6 o'clock to 4 o'clock. This finger rotation imparts axis rotation on the ball, which creates hook.
- Thumb exit: Your thumb should exit the ball before your fingers. This is critical — if your thumb stays in too long, you lose rotation.
- Finger lift: Your middle and ring fingers apply upward pressure on the ball as they rotate, generating revolution rate (revs).
- Follow-through: Your arm should continue up past your shoulder after release. A complete follow-through ensures a consistent release point.
Common mistake: Trying to muscle the hook by twisting your wrist aggressively. This creates inconsistency and injury risk. Instead, focus on thumb exit timing and a smooth finger rotation. The hook comes from leverage, not force.
Targeting: The Arrows System
Most beginners aim at the pins. Most good bowlers aim at the arrows. The arrows — the seven triangular markers embedded in the lane about 15 feet past the foul line — give you a much closer reference point and are dramatically easier to aim at than the pins 60 feet away.
The arrows are numbered one through seven from right to left (for right-handed bowlers). The second arrow from the right (sometimes called the 10-board or 2nd arrow) is the most common target for right-handed players playing a strike line. Your ball should cross this arrow on its way to the pocket.
The Strike Line
For a right-handed bowler with a hook, the classic strike line is something like this: Start from around the 20-25 board, target the 2nd arrow (10 board), and have the ball break to hit the 17-18 board entry angle into the 1-3 pocket. The exact boards depend on your ball's motion and the oil pattern — you adjust from this baseline.
The 3-6-9 Spare System
Professional bowlers use systematic spare targeting systems to make spare shooting predictable and repeatable. The 3-6-9 spare system is one of the most widely taught. The principle: for every 3 boards you move your feet, the ball moves 6 boards at the arrows and 9 boards at the pins. Using this simple ratio, you can calculate exactly how far to move your feet to hit any spare.
- For the 7 pin (far left), right-handed bowlers move their feet 6-9 boards to the right of their strike position.
- For the 10 pin (far right), right-handed bowlers move their feet to the left of their strike position.
- All other spares fall somewhere in between.
Ball Speed and Rev Rate
Two of the most important measurable variables in bowling are ball speed and revolution rate (revs). The ratio of these two determines how much the ball hooks and how it reacts to the lane conditions.
Average ball speed at the pins for recreational bowlers is approximately 14-16 mph. Most PBA professionals release the ball at 16-18 mph. Higher ball speed generally means less time for the ball to react to friction, so it hooks less and goes longer before breaking. Lower ball speed allows more reaction time and typically more hook.
Revolution rate is measured in RPM (revolutions per minute). High rev rate players (like Jason Belmonte) may average 400-500+ RPM, creating enormous hook potential. Lower rev players compensate with precise targeting and ball selection. Neither is objectively superior — what matters is that your rev rate and ball speed work together coherently and match your equipment and lane conditions.
Reading Lane Conditions
One of the skills that separates recreational bowlers from competitive players is the ability to read and react to lane conditions. The oil pattern on the lane affects where the ball hooks, by how much, and when. As you bowl more games, you move oil around and the pattern breaks down, requiring adjustments.
Signs the Lane Is Changing
- Ball hooking early: The lane is drying out. Move your feet towards the oil or use a weaker ball surface.
- Ball going long and leaving weak side misses: Oil is carrying further down the lane. Move towards drier boards or use a more aggressive ball.
- Inconsistent pin action: The pattern is breaking down unevenly. Try a different line angle.
- Ball not reacting: You may be in a heavy oil track. Move off the track or use a stronger surface.
The Mental Game
Bowling is as much a mental sport as it is physical. Even professional bowlers with technically perfect mechanics struggle without the right mental approach. The ability to stay focused, manage mistakes, and maintain routine under pressure separates champions from those who choke.
Pre-Shot Routine
Every consistent bowler develops a pre-shot routine — a specific sequence of actions and thoughts that happen before every delivery. This might include wiping the ball, picking up the rosin bag, taking a breath, visualizing the shot, stepping to the dots, and going. The details matter less than the consistency. A routine anchors your focus and creates a mental "reset" before each shot.
Dealing with Errors
Every bowler throws bad shots. Every single one, including the best players in the world. The difference is how quickly they mentally reset and recommit to the next shot. Dwelling on a bad shot while preparing for the next one guarantees another bad shot. Develop the discipline to acknowledge what went wrong, make a correction decision, and then commit fully to the next delivery.
Mental principle: You can only bowl one shot at a time. The last shot is history. The next shot is the only one that matters right now. This sounds simple. It is not easy. Practice it as deliberately as you practice your physical technique.
Advanced Techniques: Two-Handed Bowling
The rise of two-handed bowling — popularized by Jason Belmonte and Osku Palermaa in the early 2000s — has challenged conventional wisdom about how bowling should be played. Two-handed bowlers use both hands on the ball throughout the approach and at release, generating exceptionally high rev rates and extreme hook angles that were simply impossible with conventional technique.
Belmonte's success (he has won more major titles than any bowler in PBA history) has inspired a generation of younger players to adopt the two-handed style. While some argue it will eventually dominate the sport, others maintain that conventional one-handed bowling — with its precision and lower ball track — remains more adaptable to varied conditions.
The debate is ongoing, but the two-handed style is unquestionably legitimate and produces elite results in the right hands. If you're starting out, we recommend mastering conventional technique first before experimenting with alternatives.